Texecom 816 configuration
| Language: | English |
|---|
Previous chapter-> Lantronix configuration / Next chapter-> CCTV configuration
Configuring Texecom Premier 816
Texecom Premier 816 control unit needs to be set up to communicate with Siwenoid using the Wintex UDL provided by Texecom Ltd. Version 5.6 or newer is recommended. You have to use it with english language setting in order to be able to use the metafile import feature of siwenoid. Language settings can be found in the setup menu under language, effectively changing the language of the application may involve a restart.
Plug in the USB end of the programming cable of the control unit (named "Premier Elite USB-Com") into the USB socket of your PC, connect the other end to the control unit main board connector designated as COM1! If your operating system is unable to automatically initialize the cable please refer to the
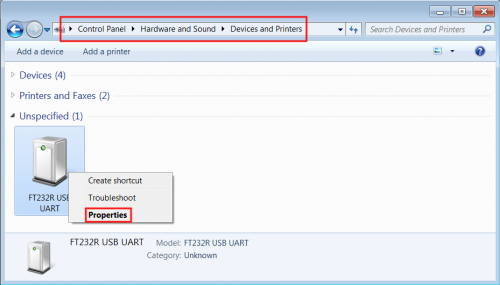
drivers page! After the hardware initialization have finished open the Control panel -> Hardware and Sound -> Devices and Printers and find FT232R USB UART device in the Unspecified section, from the right click menu on device select properties!
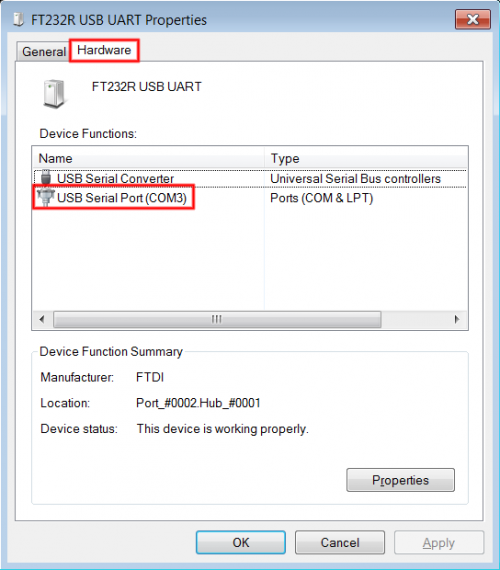
In the FT232R USB UART properties window choose hardware tab, and check the device functions list for "USB Serial Port (COM<X>)"! The expression in the parentheses form by the text "COM" and one or more digits
is the identifier of the virtual COM port. You will need the COM port number later.
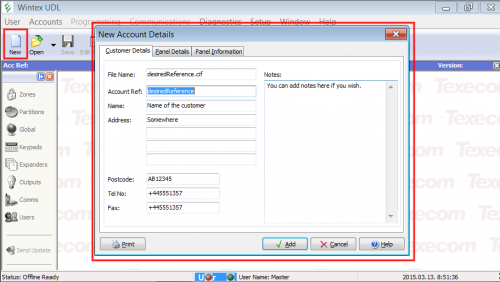
Start up the Wintex utility and add a new account, set the basic properties on the first tab. and then the control unit model on the next tab!
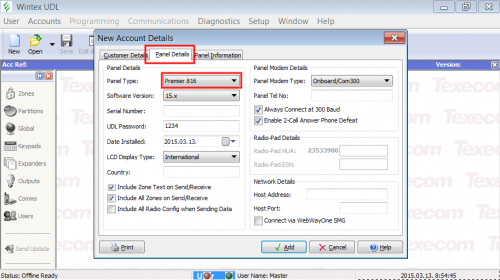
Then set the control unit model (Premier 816) on the next tab!
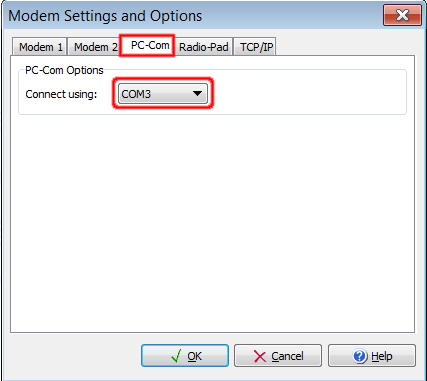
From the main toolbar (on the top of the window) select Setup, a dialog window will appear. In the dialog window select the COM port (which was specified in Control panel -> Hardware and Sound -> Devices and Printers -> FT232R USB UART properties -> Hardware -> Device functions -> USB Serial Port). Then save configuration and close the dialog window.
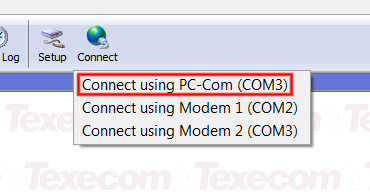
Click the a connect icon in the main toolbar, from the dropdown list select "Connect using PC-COM (COM<x>)"! In a few seconds the connection shall be established and the items on the left hand side toolbar
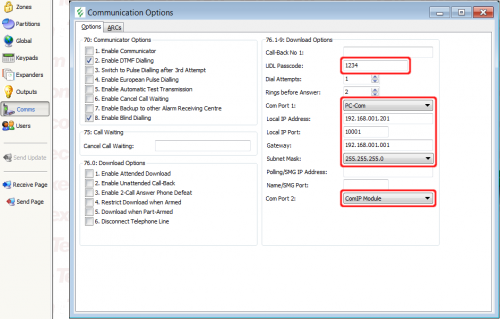
Select the "Comms" item on the left toolbar, in the dialog window set the following (you will need theese paramters later):
UDL Passcode: the passcode used for authentication (4-8 numbers).
Com Port 1: PC-Com.
Local IP Address: any free address on the subnet which will be used by siwenoid.
Local IP Port: any port number (1-65535, 10001 prefered).
Gateway: the gateway of your local network if you would like to communicate with the control unit through the internet.
Subnet mask: the subnet mask for the subnet on which the device resides.
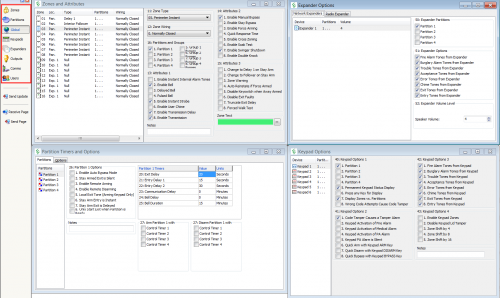
Set the other properties as required! Send the configuration to the control unit.
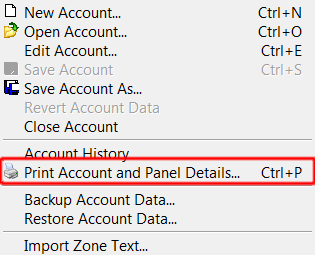
When done select Accounts -> Print Account and Panel Details... !
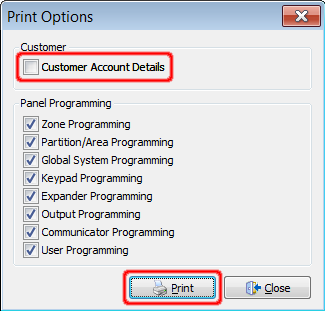
Uncheck Customer Account Details then Click print!
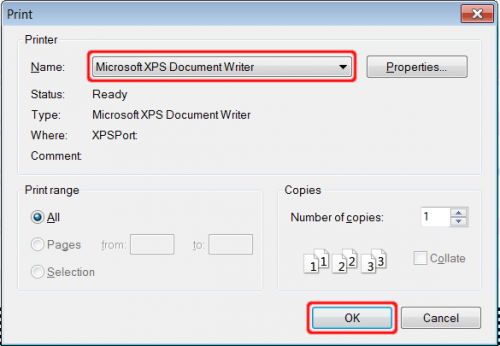
Make sure that Microsoft XPS Document Writer is selected, then click OK! Select an appropriate place to store the exported file, this file is going to be used as metafile.
Configuring SIWENOID
Siwenoid needs to be configured to use the control unit. To do so launch siwenoid!

Select Tree from the Bottom menu!
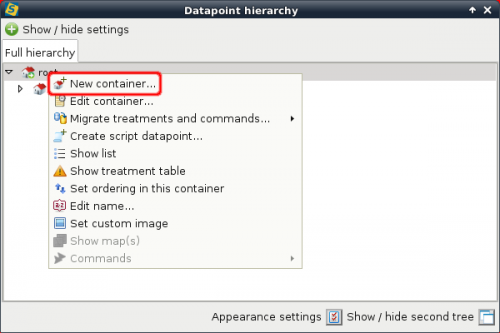
In the Datapoint hierarchy dialog showing up, right click on root select New Container...
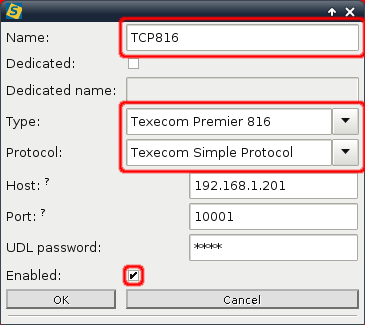
Type a name of your choice in the textbox labeled name. Select Texecom Premier 816 from Type dropdown list and Texecom Simple Protocol from the Protocol dropdown list. Make sure that Enabled is checked. Fill in the Host, Port and UDL Password fields with the same data as in the Wintex utility. If done click OK!
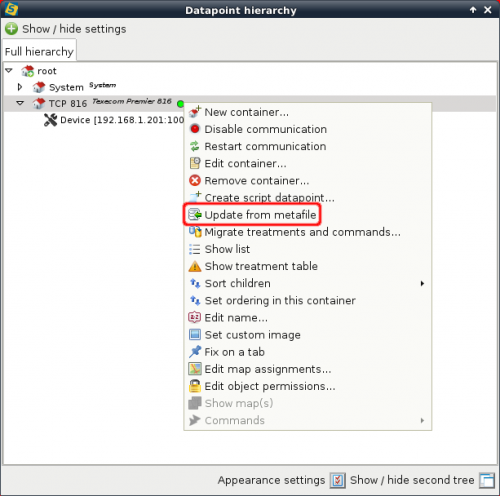
Right click on the device you have added in the datapoint hierarchy, select update from metafile, browse the metafile you created with Wintex!
You are done.
Previous chapter-> Lantronix configuration / Next chapter-> CCTV configuration