Siwenoid v2 Relaydroid configuration: Difference between revisions
No edit summary |
No edit summary |
||
| Line 39: | Line 39: | ||
<br style="clear: both" /> | <br style="clear: both" /> | ||
[[Image:abika1.PNG|thumb|left|900px]] | [[Image:abika1.PNG|thumb|left|900px]] | ||
<br style="clear: both" /> | |||
After the settings described above have been made via the web interface of the relaydroid switch, we can create the Siwenoid container / setup for the communication with the relaydroid. | |||
==Configuring Siwenoid== | |||
<br style="clear: both" /> | |||
[[Image:abika2.PNG|thumb|left|600px]] | |||
<br style="clear: both" /> | <br style="clear: both" /> | ||
Revision as of 09:02, 11 June 2021
| Language: | English • magyar |
|---|
= Siwenoid-Relaydroid communication setup =
For the setup we need the relaydroid's connection IP address, through which the device can be accessed, and a valid web admin user account/password for the device.
The default IP: 192.168.2.201 For the connection, put the PC in this range.
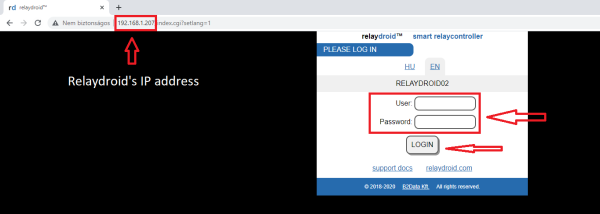
For the first step, go to your internet browser, then log in to the relaydroid's web configuration interface, with the relaydroid tool's admin username and password.
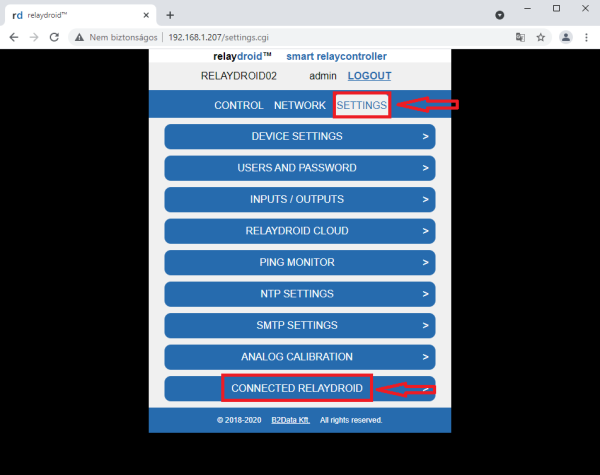
In the settings menu choose the connected relaydroid option.
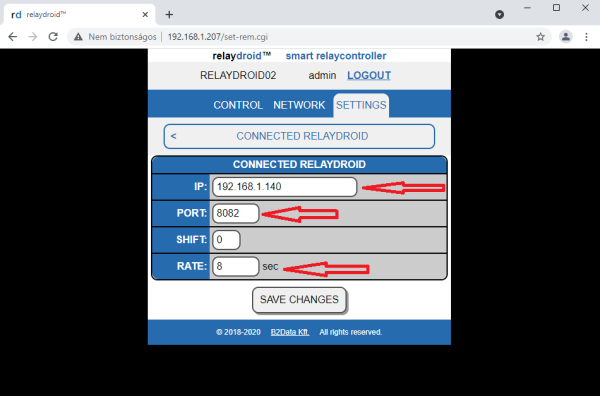
In the IP address option type in the Siwenoid server's IP address, and for the port, a port number which is surely free/available in the Siwenoid server computer. In the cycle section, specify how many seconds the relaydroid device sends an automatic status message to the Siwenoid server. Then click on the save changes button.
For the next step, in the settings menu select the users and passwords option.
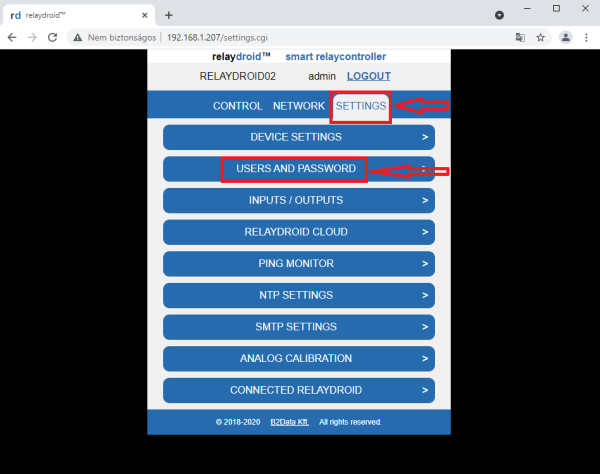
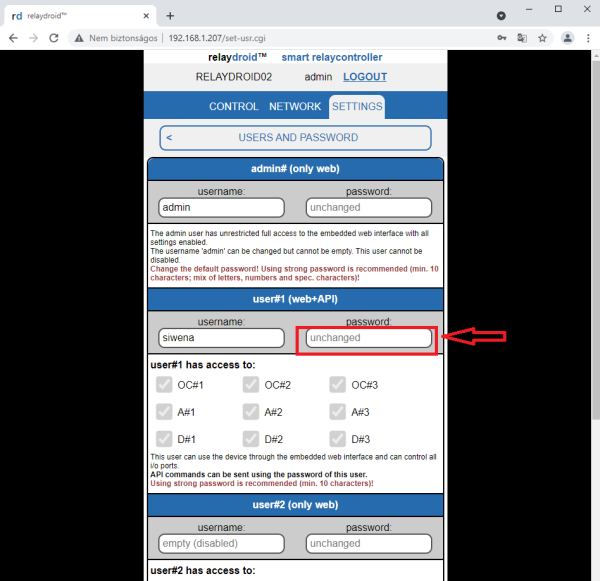
For the webapi user account (in the picture user#1 (web+API)) submit a username and a password. Later, we'll need the account's password, but for the saving of changes, the username must be filled, if it isn't already filled. Then we have to click on the save changes button it the bottom of the page (can't be seen in the sample picture).
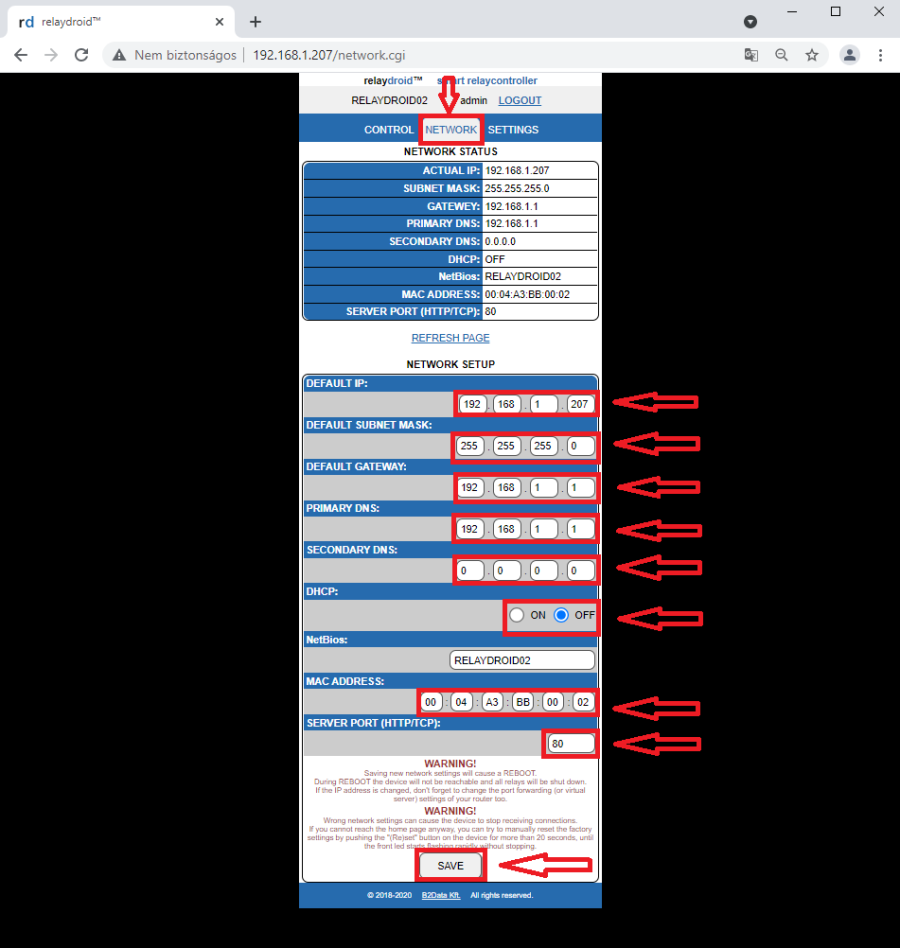
To secure the communication with the relaydroid switch, the device has to be available in a fix IP addess and port. The settings, that are needed for this can be set in the network option. The needed device settings can differ from network to network. Without the needed knowledge of the network, for help, you can contact your network specialist or network administrator.
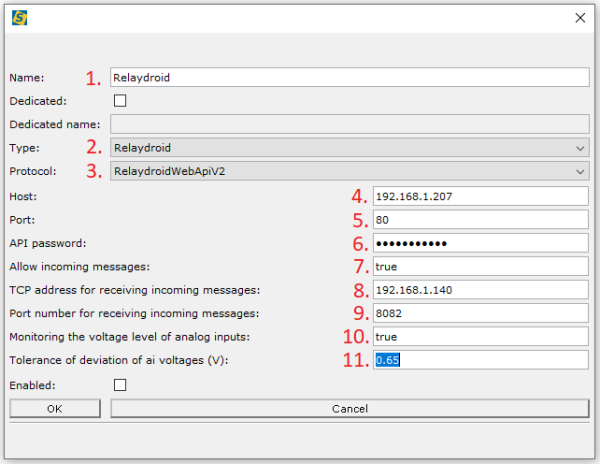
After the settings described above have been made via the web interface of the relaydroid switch, we can create the Siwenoid container / setup for the communication with the relaydroid.
Configuring Siwenoid
