Create map/hu
| Language: | English • magyar |
|---|
Előző fejezet-> Datapoint treatment/hu / Következő fejezet-> User permissions/hu
Adatpontokat dinamikus ikonok jeleníthetik meg térképeken. Egy térkép mindig tartalmaz egy háttérképet és dinamikus szimbólumokat.
Térkép készítése
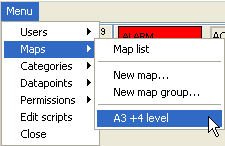
Új térkép létrehozásához válaszd a Menu->Maps->New map... menüt. Egy üres térkép kerül létrehozásra.
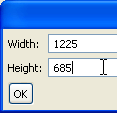
Előszőr a méretét állítsd be Map_menu->Set_size.... A térkép mérete ideális esetben megeggyezik a következőben hozzárendelendő háttérkép méretével. Ha ez nem egyezik, akkor a háttérkép mérete hozzáigazodik a térkép méretéhez.
Majd rendelj a térképhez háttérképet Map_menu->Set_picture.... Válaszd ki a megfelelő háttérképet. Többféle pixel grafikus formátum támogatott (bmp, jpg, png, gif). A háttérképek mindig a \server\data\maps\ könyvtárba töltődnek fel, még akkor is ha az egy kliens gépen került kiválasztásra. Az alkalmazás mindig gondoskodik arról, hogy a \server\data\maps\ és a \client\data\maps\ könyvtárak szinkronizálva legyenek. Ez a szinkronizálás a háttérben történik, a felhasználótól elrejtve. Ez a szinkronizáció biztosítja, hogy a térkép háttér képek nincsenek a szerver és a kliens között folyamatosan másolva. Szinkronizált másolatok tárolódnak a kliensek helyi mappájában.

Add meg a térkép nevét az ablak alján levő mezőben. Itt az aktuális térképet egy csoporthoz is hozzá lehet rendelni. Térkép csoportok definiálhatók a Menu->Maps->New_map_group... menüben.
Mindig ments el a térképet Map_Menu->Save... menü alatt. A térkép ablak fejlécében a csillag a jelzi, hogy a térkép módosítva volt de még nem volt elmentve.
Dinamikus ikon a térképen
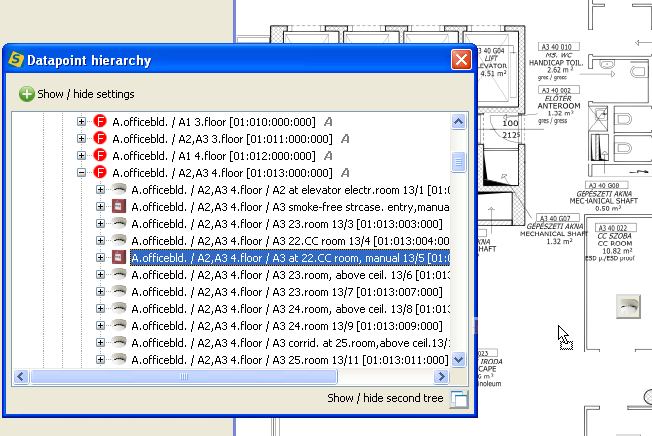
Nyisd meg az adatpont fát és húzd át bármelyik adatpontot a térképre. Az adatpont megjelenik a térképen az alapértelmezett szimbólumával. A pozíciója a későbbiekben is változtatható, ha odébb húzod. Legördülő menüből az adatpont alapértelmezett ikonja megváltoztatható. Ha több ikont akarsz egyidejűleg módosítani használd a Beállítások menüjét a térkép ablaknak.
Alapértelmezett térkép hozzárendelés
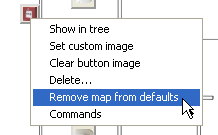
Datapoint can have several instance on the same map and they can even reside on different maps. In this case it is nevessary to define which map should open when user click on the map button of a certain event in EventViewer. For this right click on an icon of a datapoint on a map. A popup menu opens. Here you can "Remove map from defaults" and "Add map to defaults". More than one map can be assigned as default to a datapoint. In this case each default map will open when you click on the map button of a certain event in EventViewer.
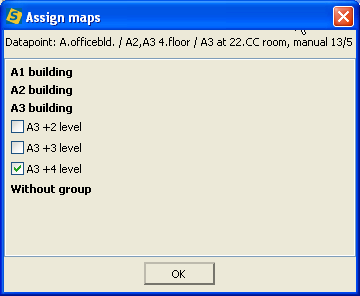
Other possibility to assign a map to a datapoint even if it doesn't reside on it. This is useful when you want a datapoint to associate a map on which only its parent datapoint resides (but itself doesn't). For this navigate to the datapoint in the tree. Right-click and popup menu appears. Select "Edit map assignments...". A list appears with all maps. Checkboxes show if the datapoint is assigned as default to a certain map. You can select as many maps as you want. Each map will open when you click on map button of an event of a certain datapoint in EventViewer.
Add a link to another map
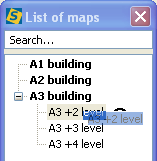
Open "List of maps" dialog by Menu->Maps->Map list. Here you can find all of the maps that are defined in your project. From this list select any map and drag&drop onto the map. A green icon appears. Click on it and the associated map opens. You can add as many map link icon to a map and a certain map link icon can reside on more than one map.
When you drop the map icon onto an existing datapoint icon then it aligns automatically on the left side of existing icon. With this feature a parent datapoint and its "children map" can be easily kept together.
Add a print icon to a map
Change the appearence of an icon
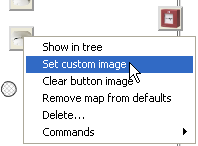
Right-click on an icon and on popup menu select Set custom image. In the file dialog select an image for the icon. It will be streched to the size of icon.
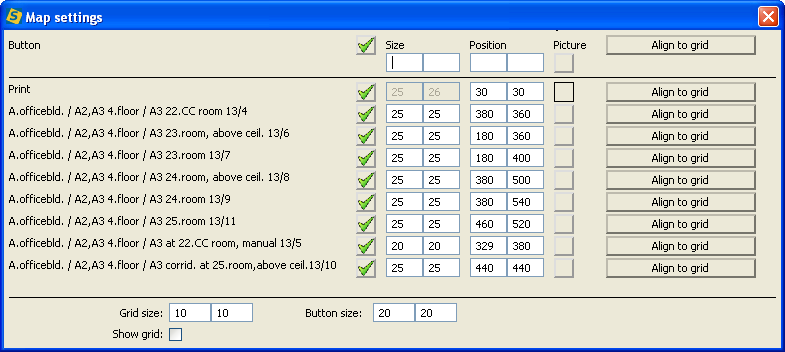
Open "Map settings" dialog by Settings menu of a map. This dialog lists the dynamic icons and elements of the map. In the corresponding fields the size and positions of elements can be changed. Use the check flags to make changes on multiple elements. In this case type the values on the most top separeted input fields.
On the bottom set the default button size that will be used during the next drag & drop.
Use show grid checkbox to lay a grid onto the map. If you press ALT and drag and icon now, then during drop its top-left corner will be aligned to the closest grid.