CCTV configuration: Difference between revisions
No edit summary |
No edit summary |
||
| Line 13: | Line 13: | ||
[[Image:Show_live_video.png|left|frame]] Use popup menu of a camera node to show a live camera picture. Camera picture appears in a window. Double click to picture to change to default split format. | [[Image:Show_live_video.png|left|frame]] Use popup menu of a camera node to show a live camera picture. Camera picture appears in a window. Double click to picture to change to default split format. | ||
<br style="clear: both" /> | <br style="clear: both" /> | ||
[[Image: | [[Image:Cctv_drop_camera_onto_player.png|left|frame]] Open a CCTV player (bottom menu) or use an existing one to drag&drop a CCTV camera node to any slice to show its live video. | ||
<br style="clear: both" /> | <br style="clear: both" /> | ||
Revision as of 09:22, 11 June 2012
| Language: | English • magyar |
|---|
Previous chapter-> Containers / Next chapter-> Datapoint settings
Different subsystems require diferent methods.
DVR definition

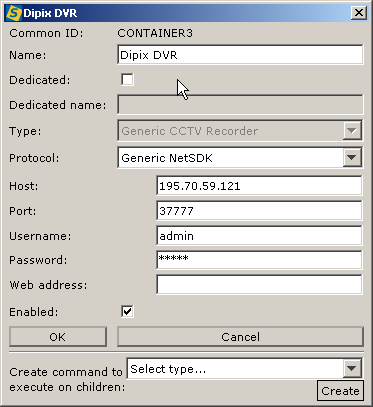
Create a new container using the popup menu on the root node. In the dialog, set the Type and Protocol and then the IP address (domain name can be used), port number, user name and password of DVR access.
Finally enable it using the check box. Communication automatically initialize the DVR node and available cameras appear in the tree structure.

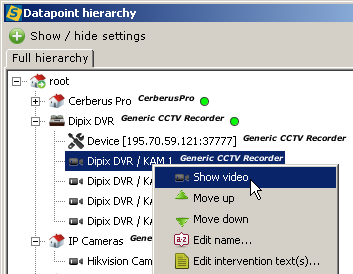
Use popup menu of a camera node to show a live camera picture. Camera picture appears in a window. Double click to picture to change to default split format.

Open a CCTV player (bottom menu) or use an existing one to drag&drop a CCTV camera node to any slice to show its live video.