Siwenoid v2 Aritech configuration
| Language: | English • magyar |
|---|
Setting up the Atc 1000 for an Aritech control panel
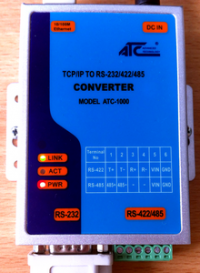
For communication we will need an Atc-1000 Ethernet converter with the following settings.
The default IP address for the ATC-1000 is 192.168.2.1
Connect to a computer via Ethernet, then enter the above IP address into your browser.
Fill in the required username and password fields. (Default username: admin, password: system)
Once logged in, click "UART" in the left menu and set the fields as follows:
UART settings
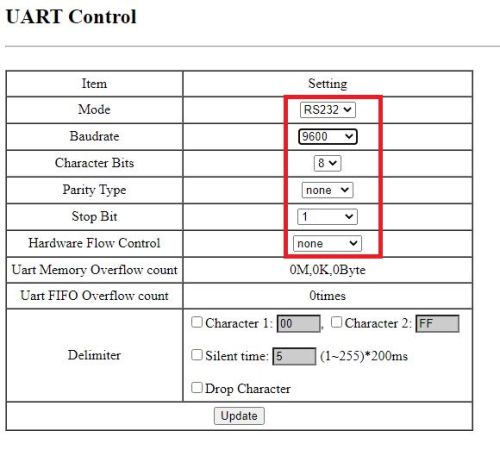
Mode: set to RS232
Baudrate: set to 9600
Parity Type: None
Stop Bit: 1
Hardware Flow Control: None
Port setting
To communicate with Siwenoid we will need a TCP port, which can be set in the TCP Mode menu.
The Port is set to "23" by default. If we change it, note that it will be necessary to communicate with Siwenoid.

IP-mask-gateway setting
Set the IP for the ATC according to the network segment (Siwenoid will also need this) and the network mask and gateway.

Connection between control panel and ATC-1000
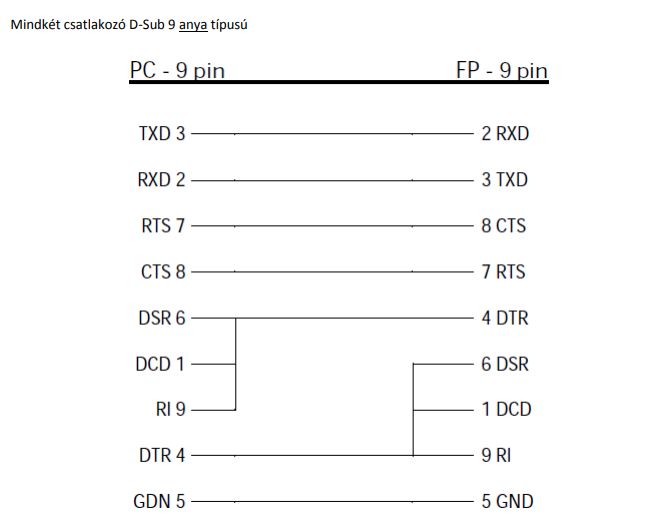
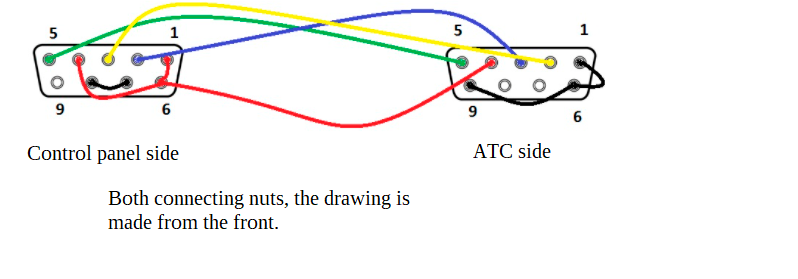
Communication will require a special cable, which must be made by hand.
We will need 2 9-pin female connectors and at least 4-core cables.
The connection is shown in the following figure:
Checking the control panel's settings for upload
In order to upload from the control panel, we need to create a site that matches the control panel settings.
We need to check the following settings on the control panel.
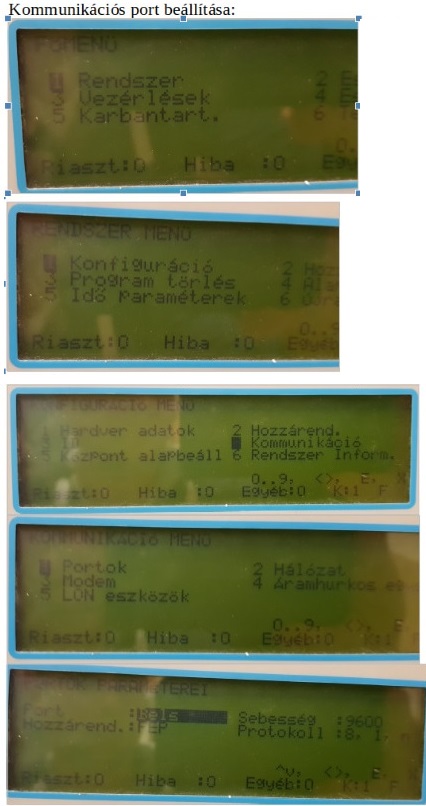
1.) Enter the password.
2.) System.
3.) Configuration.
4.) Communication.
5.) Ports. ---> Correct settings: Port: Internal, Speed: 9600, Assigned: FEP
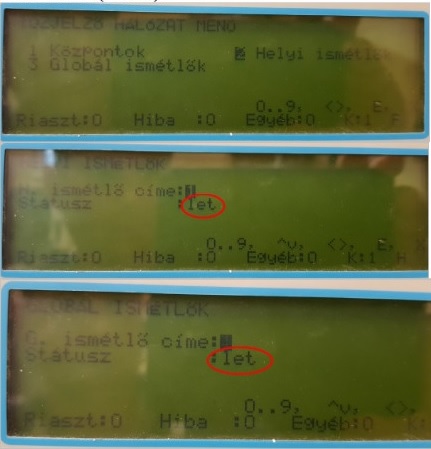
6.) Go back one menu and select the network menu.
7.) Local Repeaters: Title 1, Status: let.
8.) Global Repeaters.
9.) Global Repeater Title 1, Status: let!
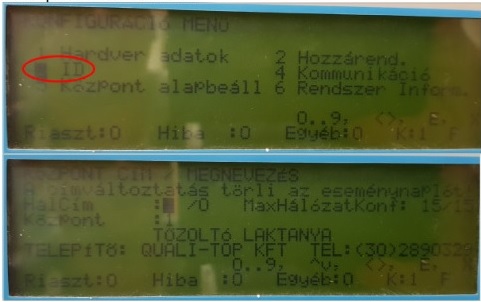
10.) Let's go back with a menu!
11.) Select the ID.
Note all the data here (NetworkAddress, Center, MaxNetworkConf), you will need it for the Site.
Site creation
Launch our program and create a new Site.
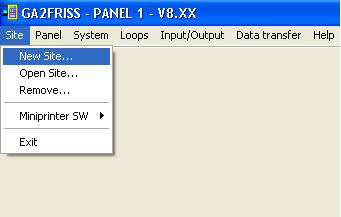
Name it, and then create a new panel.
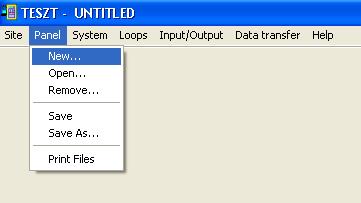
Configure the Panel based on the type of control panel and the ID set. Host version can also be set, if it is not set correctly when uploading warns the program, it can still be changed.
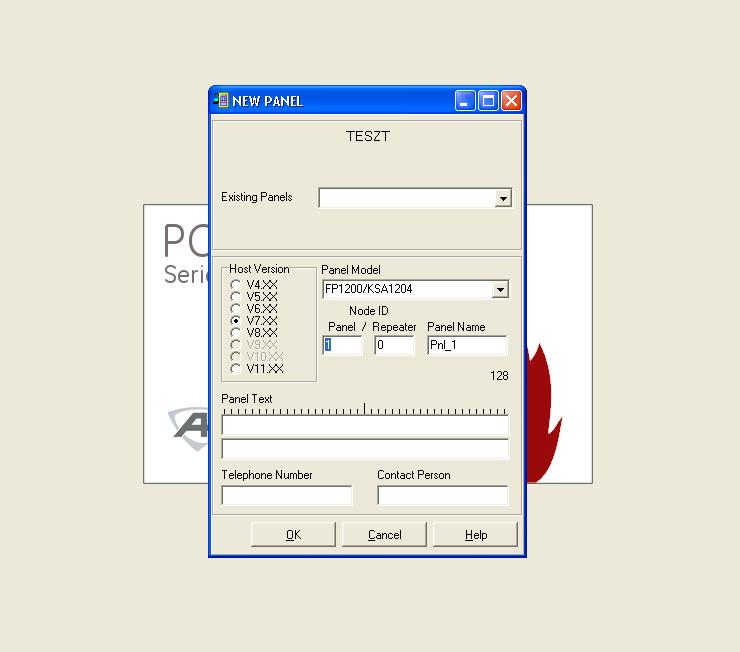
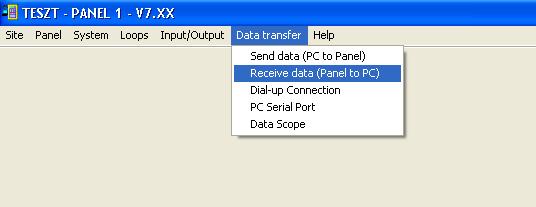
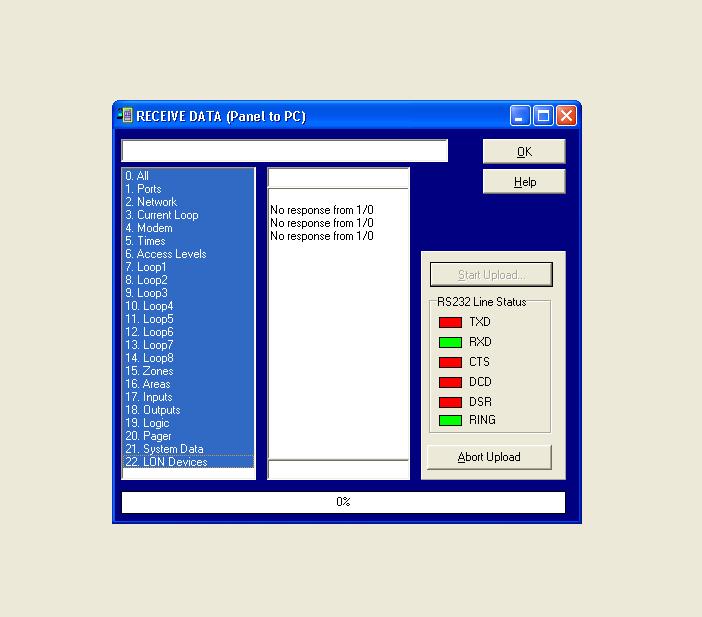
If you have set up the panel, select Data Transfer/Receive data (Pantel to PC).
Connect the PC and the control panel with the programming cable (if not available according to the drawing).
After the connection in RS232 Line Status if everything is green, just press Start Upload.
Here, the Software will indicate if the control panel version does not match the Site version, in which case change it to the appropriate one in the panel settings.
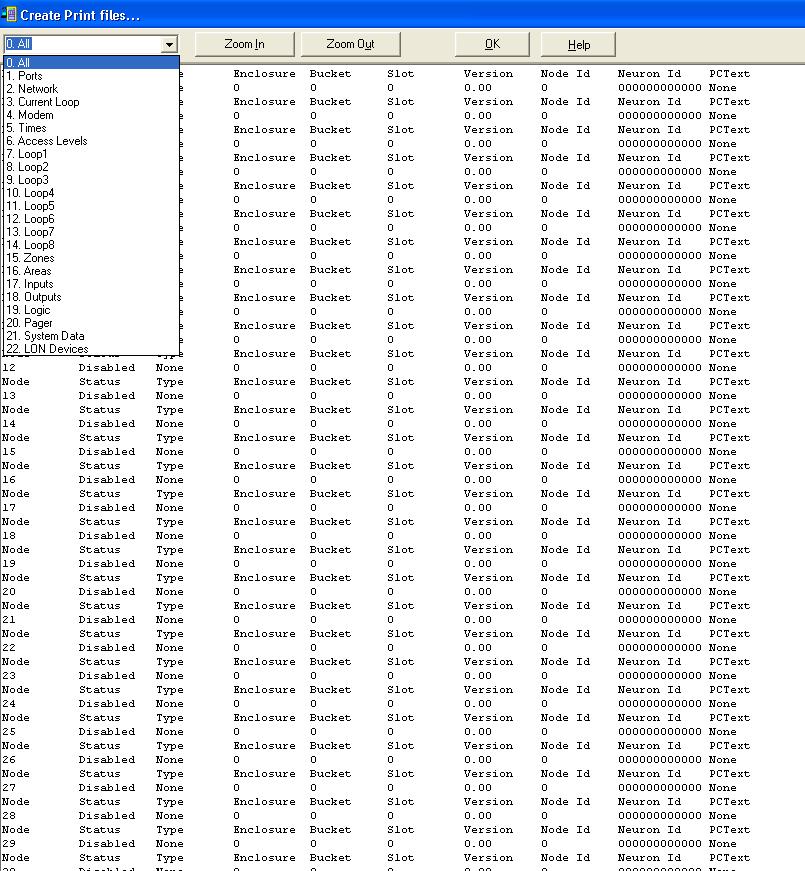
Once uploaded, the data required for the metafile can be accessed in the PANEL/Print Files menu.
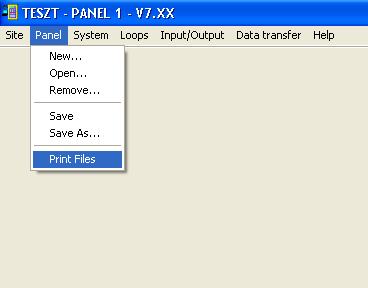
In the window that appears, select ALL. When you're done listing your data, copy WHOLE! (Important: Make sure you really select everything (CTRL+A doesn't work)).
Create a new text document (TXT) for the copied text, copy it, and save it. This will be the METAFILE.
Import Metafile
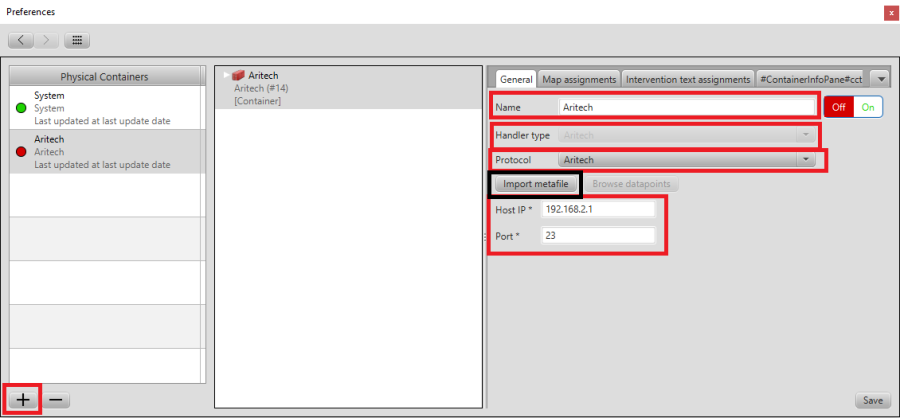
From the File/Options menu, select the physical structure and then create a new container.
Name it, select the Aritech type and then the corresponding protocol.
Fill in the other fields as set for ATC-1000. (IP, PORT).
Click save. We can then import the created METAFILE.
